Create a UK Gemini 2.3 compliant Metadata Record in GeoNetwork
1. Introduction
This document walks you through the process of creating a metadata record in the Astun-hosted Metadata Catalog, compliant with the Gemini 2.3 metadata standard, using the supplied shared templates.
It is not intended as an in depth guide to all aspects of Gemini 2.3- for in depth information please see the official guidance on the AGI website.
2. Background
The form you will use to edit data is a front end to an XML record - so the result of the editing process will be an XML record, stored in the GeoNetwork database. You can view and even edit the XML record directly if necessary, but this is usually not required.
3. Editing tips in GeoNetwork
The following tips may help you to use the GeoNetwork editing interface.
- Under each of the required fields is a snippet of guidance to help you populate the record. This contains a link to the official Gemini guidance for that element

- A red asterisk * indicates a required field for XML schema conformance - however note that other fields are required for other validity checks
- A down triangle to the right of the field indicates a drop-down where you must choose one of the values
- A drop-down labelled Recommended values indicates that you can use on of the values in the drop-down to populate a field, or type your own

- A black + indicates that you can add multiple instances of a field or section - click on the + to add another
- A red X indicates that you can delete an instance of a field or section - note that in some cases, the X only appears when you hover over the item
- A black triangle next to a section heading means the section can be expanded or collapsed
4. Advanced editing
The Simple editor is in general sufficient for creating a valid Gemini-compliant metadata record, but there are scenarios where it is necessary to use the Full editor. If you have a requirement to add additional entries, such as additional points of contact, then it is necessary to use the Full editor. Furthermore some validation errors are easier to locate and fix in the Full editor.
To access the Full editor, click on the 'eye' icon in the main toolbar.
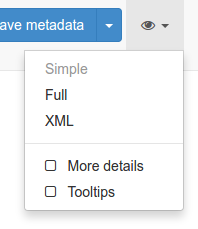
Select the Full option for a more detailed form, and the XML option to view/edit the raw XML data.
Note
Editing in XML is not recommended unless you are confident in doing so - it is easy to create errors that will invalidate the metadata and prevent the simple or advanced views from displaying!
5. Create a new dataset record
- Go to your GeoNetwork site - you will have been provided with a URL and credentials by your Astun Constultant.
- You will see a screen similar to this, but with a different logo and title:
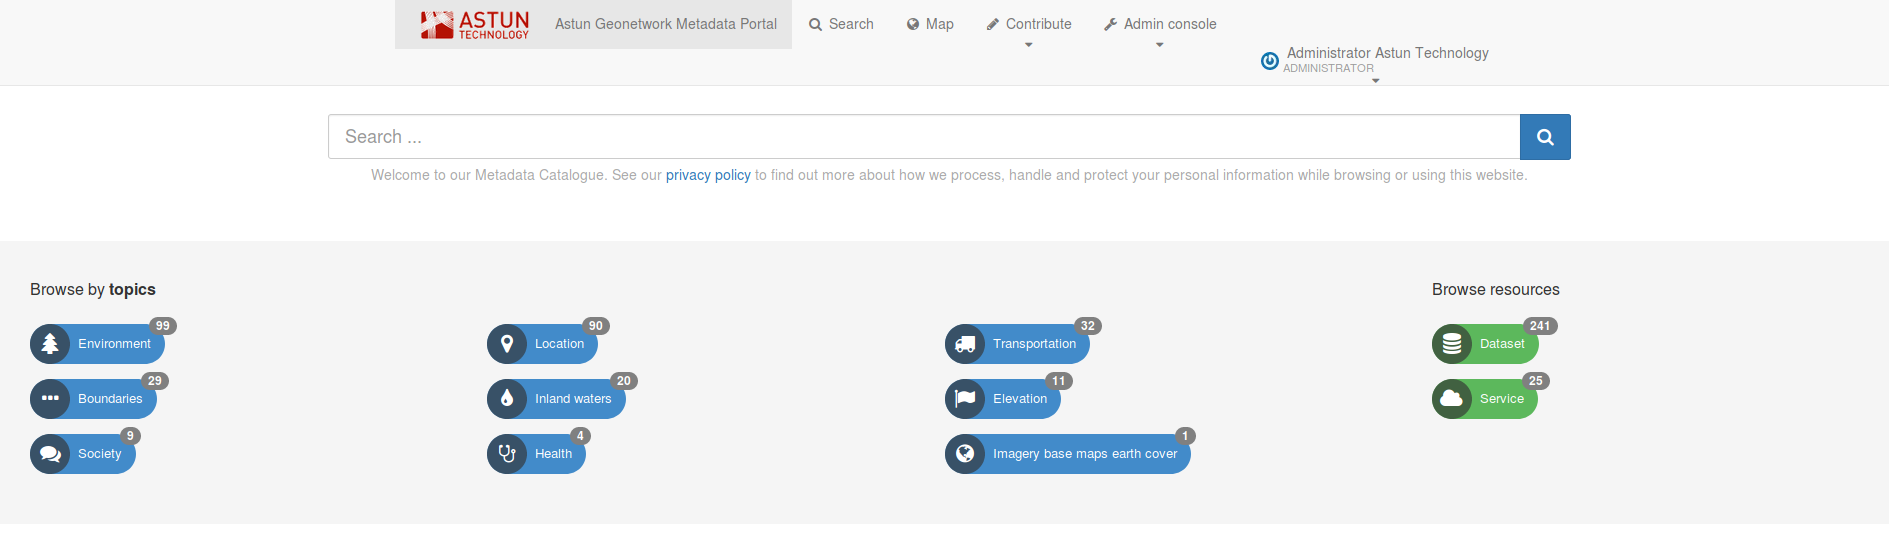
- Sign in with the credentials provided. Click your username in the top right to add details and reset your password as required.
- Once you are signed in, you will see additional icons and labels in the header bar - note that if your screen is below a certain size, you will see icons only, not the descriptions.

- Click on the Contribute button, then on Add new record

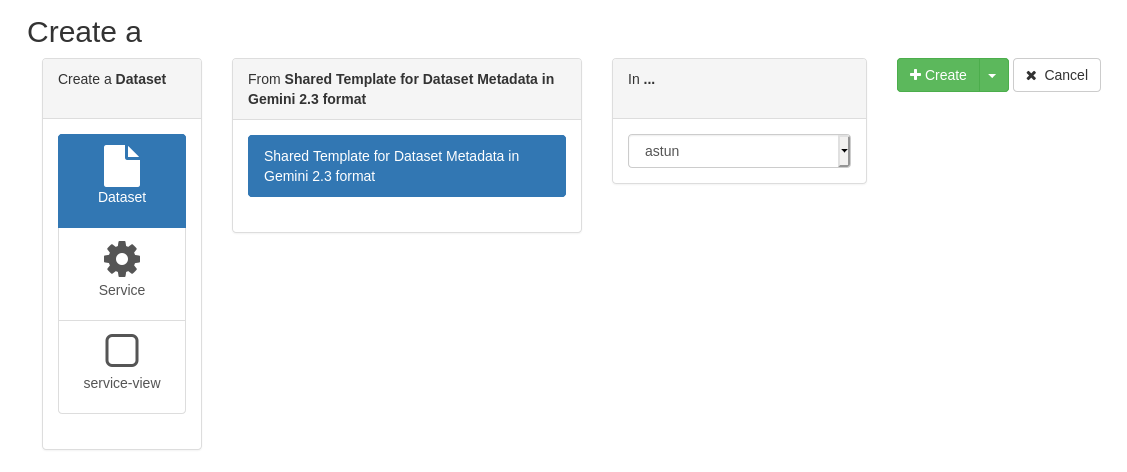
- In the following dialogue, ensure that Dataset is selected in the left hand panel, select an appropriate template (generally Shared Template for Dataset Metadata in Gemini 2.3 format). Your group should be selected in the in... dropdown. Then click + Create
- A new record will be created, with some elements already populated. If these are editable (some are not, such as the schema name and the metadata creation date) then these should be overwritten with your values.
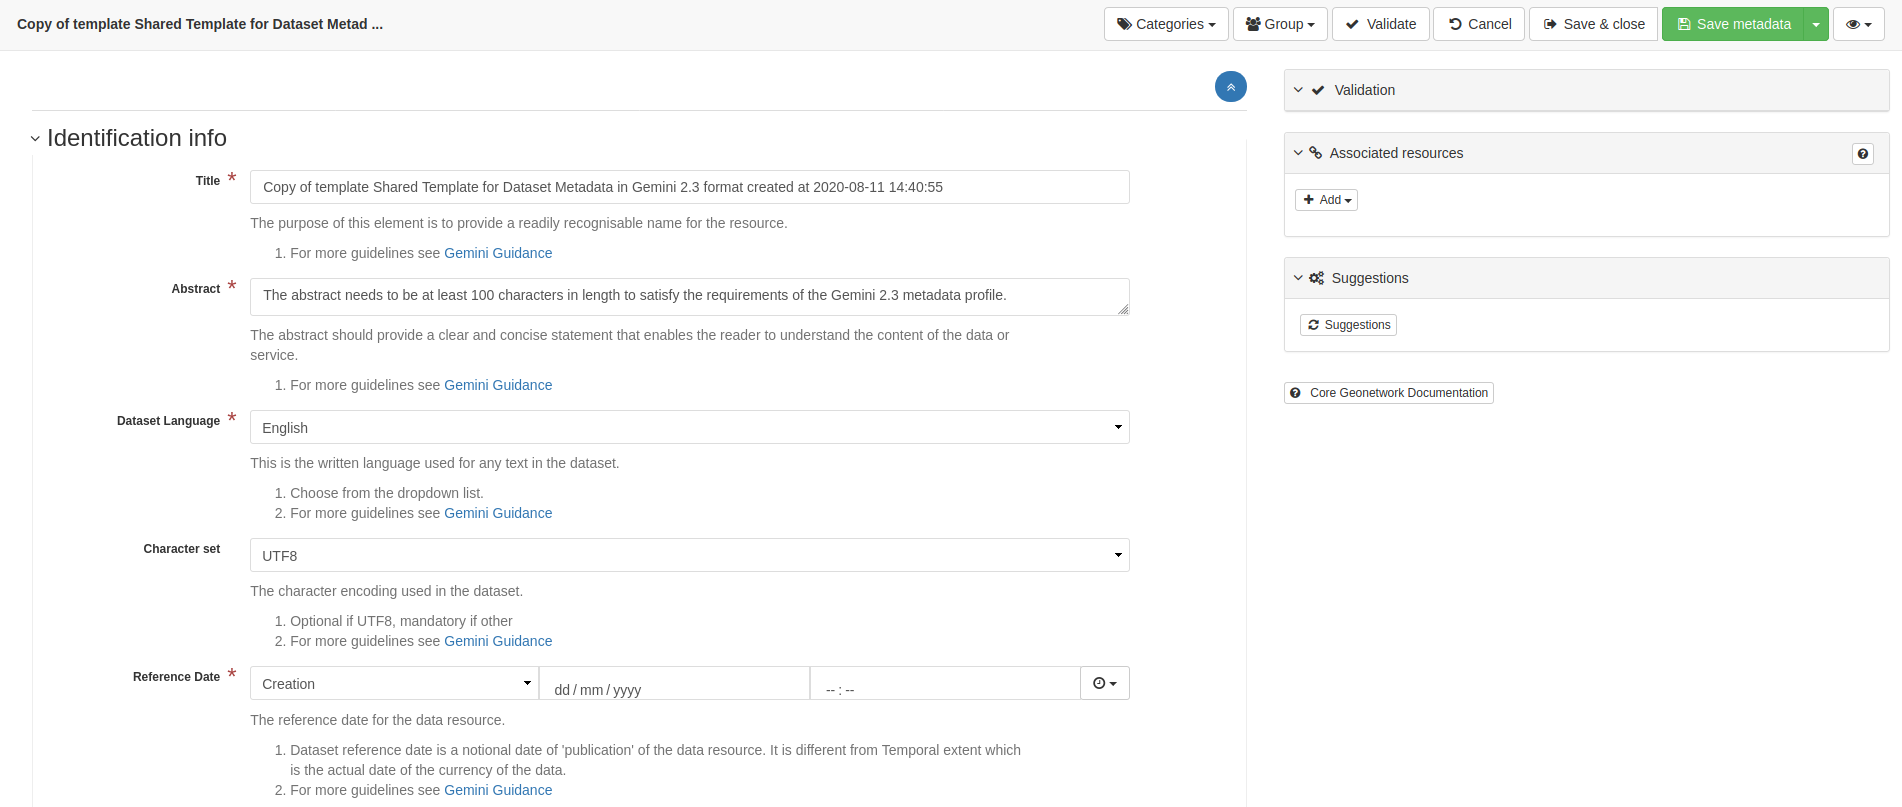
- Populate the record, using the in-built guidance below each element, and the appendix to this document for help.
- Click Save metadata to save the record and remain in editing mode, or Save & close to save the record and return to the main screen. Note that selecting Cancel without saving first will delete the record that you have created.

- To save the record as a template, which you can use as a starting point for new records, click the arrow to the right of the Save metadata button and select Save as template
5.1. Adding Associated Resources
The Associated Resources Wizard is a dialog box to the right of the metadata editing interface, that makes it easier to add associated resources. These may include, but are not limited to:
- WMS or WFS URLs
- Links between service and dataset records
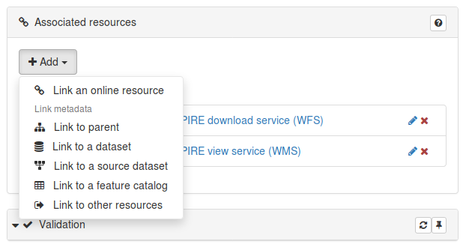
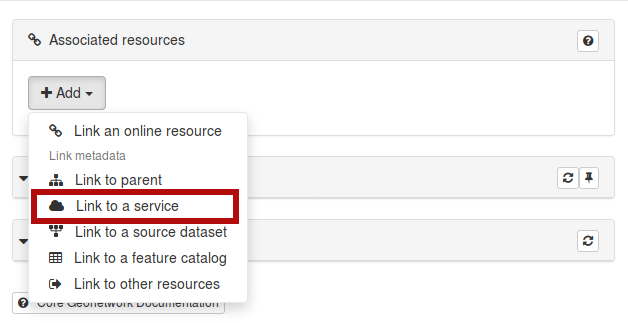
To add a new associated resource, click the blue plus icon and choose from the dropdown list.
5.1.1. Adding a WMS or WFS Link
Click the Add document option in the dropdown list.
For WMS choose the following options:
- Function: Information
- Protocol: OGC-WMS Web Map Service
- URL: The URL you have been provided by your Astun consultant that points at the root of your WMS request, without the request or version parameters. Geonetwork will check the validity of this request automatically.
- Select the correct layer from the available list, which will populate the Resource name and Description fields.
- Application Profile: Can be left blank
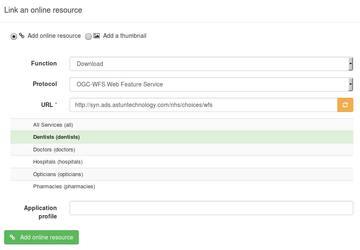
For WFS choose the following options:
- Function: Download
- Protocol: OGC-WFS Web Feature Service
- URL: The URL you have been provided by your Astun consultant that points at the root of your WFS request, without the request or version parameters. Geonetwork will check the validity of this request automatically.
- Select the correct layer from the available list, which will populate the Resource name and Description fields.
- Application Profile: Can be left blank
When the link is successfully validated, click the Add online resource button to add the URL to your record.
You can provide a direct link to a shapefile download by configuring your mapserver map file to include the additional SHAPEZIP outputformat as described here: https://mapserver.org/output/ogr_output.html#ogr-output and then appending &outputformat=SHAPEZIP to the WFS GetFeature URL. Ask your Astun consultant for more information
5.1.2. Linking to a service
See below for information on creating service records.
Click the Link to a service option in the dropdown list.
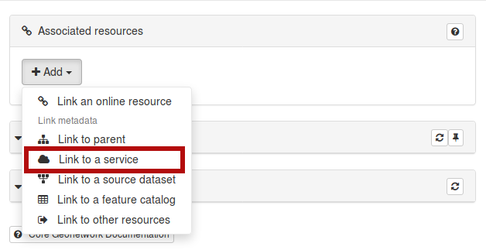
This will open a dialog with a list of the available services in the metadata portal that you have access to. Select the appropriate service record. If an additional dialog appears asking you to optionally select a layer, this can be ignored. Click the green Link to a service button to link the service.
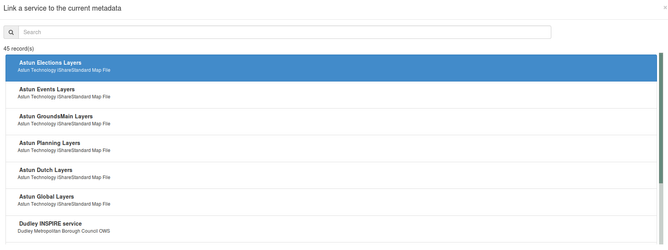
Linking to a service in this way also creates the reverse link, from the service to the dataset
6. Service records
The service record is an overarching descriptor about your INSPIRE data and your authority, rather than a specific dataset. The main purpose of a service record is to provide links to the included datasets. An example of a service record would be to describe your INSPIRE WMS/WFS, with links to the various included datasets or layers.
The official guidance on Service records can be found here.
To link dataset records to a service, navigate to the dataset record and edit it. In the Associated resources wizard click the plus button to add a resource. From the list, choose Link to service.
In the next window, choose the service you wish to link to from the list, and click the green Link to a service button.
7. Validate a record
When you have completed the form, use the Validate button in the page header toolbar to verify that what you have entered meets the rules (or schematrons) that have been set for the profile you are using.

The compact version of the validation wizard shows the 4 sets of rules that Gemini 2.3 records are validated against, with the number of failing rules (as a proportion of the total) in each case:
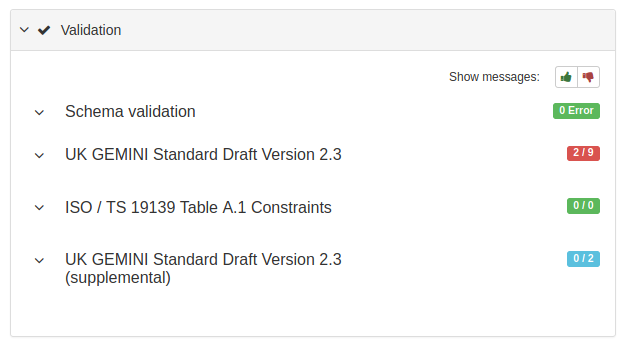
Green means that there are no failing rules for that ruleset. Red means that there are failing rules that do invalid the record. Blue indicates that rules are failed, but that this ruleset is for suggestions only.
To see failing rules, select the red thumbs down symbol.
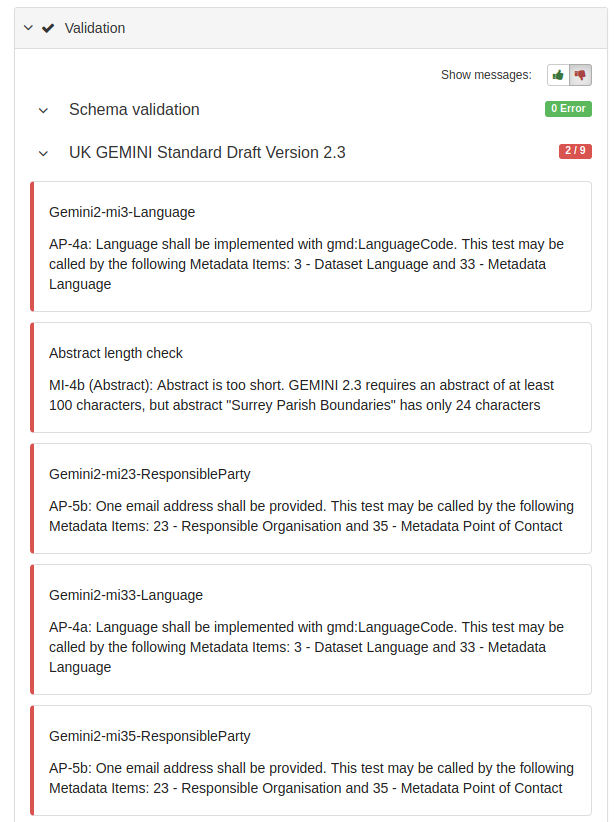
In some cases, but not all, GeoNetwork will highlight the failing element within the editing interface itself, however, this is not done for every class of error.:

Review each error in turn and fix as required. In most cases, details of what is needed to fix the errors are given. Mousing over the error message will also provide you with an xpath representation of where the error can be found. While this looks complex, the local-name() parts of the xpath correspond to the major headings in the editor, such as IdentificationInfo, and can be used to track down the error.
Note
Not all validation errors can be displayed in the Simple or Full editor views, or have clear error messages. Contact your Astun consultant if you cannot interpret or locate an error.
Use the Validate button in the page header to re-run validation following correction of errors - note that you do not need to save before doing this.
For more details on common UK Gemini and INSPIRE validation errors and how to fix them, see the Common validation errors page.
8. Publication
See Metadata Publication: Enterprise or INSPIRE+Enterprise for information on how to publish your record if you are an Enterprise or Enterprise + INSPIRE customer with your own portal.
9. Appendix: Section and field details
The record headings and fields are described in detail below. Note that those included here comprise the minimal set required to satisfy the requirements of the schema - you may choose to add more.
- Identification info
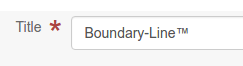
This section contains data which uniquely identifies the record, and tracks the key dates relating to the referenced data.- Title: a descriptive title for the record, for example Local Authority Boundaries, England and Wales
- Abstract: a short description of the data. Note that for Gemini 2.3 compliance this must be over 100 characters in length
- Dataset Language: the written language of any text in the dataset. This is most likely to be English (eng) but other languages can be selected from the dropdown list.
- Character set: the character encoding used in the dataset. This is generally UTF8 but other encodings can be used.
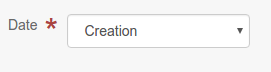
- Reference Date: generally a notional publication date for the dataset. Use the drop-down to set the date type, then enter the date. Note that this date refers to the data itself, not the metadata record.
Use the advanced editing view to add multiple dates (eg revision dates) - Resource Identifier Code: this will normally be auto-generated - however you can overwrite if you are using your own identification schema
- Responsible organisation: This identifies who is responsible for the dataset, it is not necessarily the same as the person or organisation responsible for the metadata record.
- Organisation name: the organisation which publishes the data
- Delivery point: the postal address for the responsible organisation
- Electronic mail address: this should be ideally be a permanent email address, not an individual
- Role: the role of the responsible organisation- generally publisher
- Resource Maintenance: the frequency of any updates to the data, and who is responsible
- Maintenance and update frequency: planned frequency of data updates
- Contact: optional person or organisation responsible for updates if different to the responsible organisation listed above or the metadata point of contact (see below)
- Keywords: Use the button or select them from a thesaurus and select GEMET - INSPIRE themes, version 1.0 to open the INSPIRE themes thesaurus. Note that for full Gemini 2.3 compliance at least one keyword representing the INSPIRE theme should be included.
- Search: Click in the box for a list, or start typing for suggestions - you can add several values
- Access Constraints: these indicate any conditions on accessing the data (as opposed to using it), such as license arrangements. The values required for basic Gemini 2.3 compliance are pre-filled in the template. See the official Gemini guidance for more information.
- Use constraints: Conditions applying to the use of the data resource (as opposed to accessing it).The values required for basic Gemini 2.3 compliance are pre-filled in the template. See the official Gemini guidance for more information.
- Spatial representation type: The type of spatial data. The default is Text, table for vector data, and the other permitted values can be selected from the dropdown list.
- Spatial resolution denominator: A notional scale at which the data was captured, and hence at what scale it is suitable for use. Choose the appropriate scale from the dropdown box or enter your own.
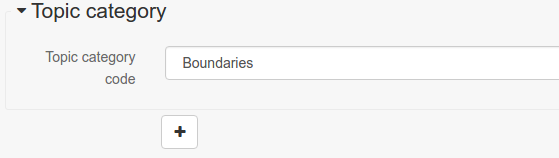
- Topic Category: A basic classification for the dataset- start typing in the box to search the list of options.
- Bounding box (has 4 options for entering your geographic extent)
- Pre-defined extent: If appropriate, select "Geonames" in the dropdown box and type your region, then select the most appropriate result.
- Draw extent: if you prefer, draw an extent on the map
- Coordinate Reference System: select the CRS in which the extent is displayed and stored - this need not be the same as that of the data itself
- Manual extent: manually enter the extent coordinates
- Temporal Extent: The date range for the data. Not to be confused with the publication or revision date. The temporal extent identifies the currency of the data. At least one of a begin date or end date is required.
- Vertical Extent: If required, provide the vertical extent of the data. If this element is completed then the Vertical Coordinate Reference System is also required.
- Spatial Reference System
- Code:The Coordinate Reference System in which the referenced data is available - note that for full INSPIRE compliance at least EPSG 4258 should be included. Enter an EPSG code in the box to find available options.
- Distribution Information
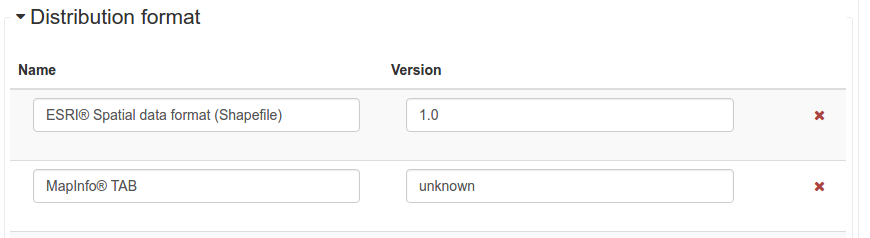
- Data format: This section describes the format(s) in which the data is available for distribution
- Name: the name of the format - choose from the drop-down or type your own
- Version: the version of the format in the field above
- Resource Locator: Where resources are available online, details of how to access them. See the section above on using the Associated Resources wizard to easily add these.
- Resource Locator: the URL of the online service for the data.
- Protocol: the type of service - use a value from the drop-down, or add your own
- Data format: This section describes the format(s) in which the data is available for distribution
- Data quality info: This section holds details relating to the quality of the referenced data
- Quality Scope (sometimes referred to as Hierarchy Level): select the type of record - normally Dataset
- Conformity: This section indicates that the dataset has been assessed against a data quality report. For Gemini 2.3 datasets as a minimum, the entire dataset must be assessed against the relevant EU Directive, however it is also valid to record that the dataset has not been assessed (rather than that it is conformant or not conformant). This case is pre-filled in the dataset template. To add further conformity reports choose from the dropdown list below.
- Lineage: information about the events or source data used in the construction of the data resource
- Metadata: This section contains data about this metadata record. Elements that are filled in automatically in this section are greyed out and read-only
- File Identifier: Auto-generated unique identifier for the record (read-only)
- Metadata language: The language of the metadata record (as opposed to the dataset). Generally English (eng)
- Parent Identifier: If this dataset is a part of a series, record the identifier for the parent record here
- Resource Type (sometimes referred to as Hierarchy Level): select the type of record - normally Dataset
- Hierarchy level name: applicable only for services or series- may refer to the title of the service or series
- Metadata date: (read-only) the date the metadata record was created or updated
- Metadata standard name: (read-only) the name of the metadata standard- generally UK Gemini
- Metadata standard version: (read-only) the version of the metadata standard- currently 2.3
- Metadata Point of Contact: details of the person/organisation responsible for maintaining the metadata record
- Organisation name: the organisation responsible for the metadata
- Delivery Point: the postal address for the organisation responsible for the metadata
- Electronic email address: contact email - this should ideally be a permanent email, not an individual
- Role: the role of the organisation - generally Point of Contact in this context