SDW Installation v2.0
Prerequisites
PostgreSQL 9.5.x or higher
PostGIS 2.2.x or higher
Installation of PostgreSQL and PostGIS
- Download the PostgreSQL 9.5 (or higher) installer from EnterpriseDB (http://www.enterprisedb.com/products-services-training/pgdownload#windows)
- Install PostgreSQL 9.5 (or higher)
- Once installed, run Stackbuilder and install PostGIS 2.2 (or higher)
Installation of SDW
- Download the PostGIS-2-extension branch of Spatial Data Warehouse from here --> https://bitbucket.org/astuntech/spatial_data_warehouse/get/PostGIS-2-extension.zip
- Copy the files astun_sdw*.sql files and astun_sdw.control to the extension folder under PostgreSQL e.g. C:\Program Files\PostgreSQL\n.n\share\extension (where n.n is your PostgreSQL version).
Edit the file setup.bat to ensure the environment variable PGHOST and PGPORT are correct.
Example setup.batsetlocal set PGHOST=localhost set PGPORT=5436 set PATH=%PATH%;C:\Program Files\PostgreSQL\9.5\bin\ createuser.exe --superuser --createrole --echo --pwprompt -U postgres astun createdb.exe --echo -U postgres -O astun sdw psql.exe -U astun -f SDW_Build.sql sdw psql.exe -U postgres -f SDW_Audit.sql sdw REM psql -U astun sdw < SDW_Build_MapInfo.sql REM -psql -U astun sdw < SDW_Test.sql REM start psql.bat
If MapInfo support is required then un-comment (i.e. remove the REM) from:
psql -U astun sdw < SDW_Build_MapInfo.sql
- Run setup.bat on the machine where the PostgreSQL database is installed.
- The scripts will create a user called astun (which is a superuser) and a database called sdw owned by astun.
- The script will prompt you for a password for the astun user three times. The first two times are to set the password when creating the astun user and the third is to log in as the astun user to run the install scripts.
Make a note of the password for the astun user as it is required later.
Create Admin User (Login Role)
- Using pgAdmin III, connect as the astun user using the password from above and launch an SQL window.
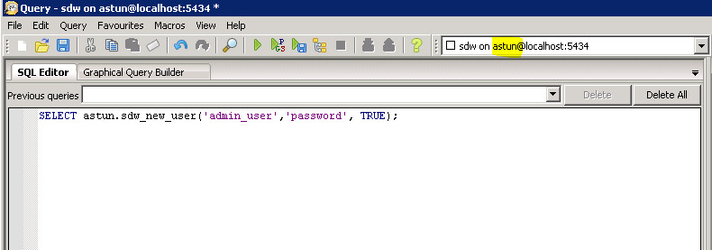
Run the following command replacing admin_user with username for admin user and password with actual password for admin user.
SELECT astun.sdw_new_user('admin_user','password', TRUE);E.g.
Create iShare User (Login Role)
- Using pgAdmin III, launch the SQL window and connect as an admin user (using username/password from above)
Run the following command
SELECT astun.sdw_new_user('iShareData','isharedata', FALSE);E.g.

If MapInfo support is required
If you did not install MapInfo support when you installed your SDW then you can run SDW_Build_Mapinfo.sql as the astun user.
Installation of Studio ETL
Studio ETL is the recommended tool for managing the SDW. User administration tasks and data transfers are handled through Studio's workflow module so it's a common requirement to have Studio on the same server as your SDW. If Studio is installed elsewhere on the network then this section can be skipped. See /wiki/spaces/ISHAREHELPSTAGING/pages/53215260nstalling iShare Studio ETL for details.
If Studio is being installed just for SDW then consider reducing Studio's modules to just Data Share Connections and Workflow.
Installation of Astun Core functions
It is highly recommended that you install the Astun Core PostgreSQL functions (astun_core).
To install these core functions:
- Download the code from here --> https://bitbucket.org/astuntech/postgres_astun_core/get/default.zip
- Copy the files astun_core.control and astun_core--*.sql into the extension folder for PostgreSQL e.g C:\Program Files\PostgreSQL\n.n\share\extension (where n.n is your PostgreSQL version).
- Using pgAdmin III, connect to the sdw database as the astun user and launch an SQL window.
- Add the astun_core extension by running the command:
create extension astun_core;
Post-Installation
You can now have a look at the iShare SDW (Spatial Data Warehouse) user documentation on how to configure your SDW. First steps would be to create some admin login roles and then look to creating schemas & migrating data. All tasks are carried out using either Studio or pgAdmin III.