Versions Compared

Key

  • This line was added.
  • This line was removed.
  • Formatting was changed.


Page Properties
hiddentrue
idKB


ThemeSecurity
Type

Authentication

Available from


...

StepNotes

Step 1  - Check iShare GIS config

Before starting, check that:

  • iShare GIS is running under https and authentication is anonymous.
  • iShare GIS is running under its own siteor at least that no other applications are running under sub-paths as ADFS config will be inherited and mess them up. This rules out having one site with iShare GIS at the root and all the services running under it (which is not recommended anyway).
  • iShare GIS web application pool has Load User Profile = True.
  • The customer has sent you:
    • Either (preferably) the URL for the FederationMetadata.XML Or the FederationMetadata.XML document itself
    • Optionally, the private key of the Token Encryption Certificate & password
Step 2 - Install the Windows Identity Framework and SDK

The Windows Identity Framework is required by iShare for the token exchange. The SDK includes the Federation Utility Wizard used in Step 4. Both therefore need to be installed.

  • Install the Windows Identity Framework
    • On Windows 2008R2 Download installer from Microsoft, run installer and select v3.5
    • On Windows 2012 onwards the download is not required
    • On all versions, then run the Powershell script below
Code Block
languagepowershell
Install-WindowsFeature Windows-Identity-Foundation


Step 3 - Configure IIS
  1. Ensure that the Application Pool is loading its User Profile (IIS Manager > Application Pools > [app pool name] > Advanced Settings > Process Model > Load User Profile = True)
  2. Ensure Authentication is set to Anonymous for the iShare GIS web application/site
  3. Set the Default Document for the iShare GIS web application/site to iShareGIS.aspx
Step 4 - Certificate installation


Info
titleNote

If the customer is using a self-signed Token Signing certificate or public CA, this step can be skipped. 

If not, follow the actions below to install any Root Certificate AuthorityIntermediary certificates supplied by the customer.

Most often self-issued certificates are used but sometimes they must be imported from ADFS, if so:

  1. Add the Certificates snap-in to an MMC instance (select Computer Account and Local Computer) and save it somewhere memorable (Add local computer certificate snap-in)
  2. Copy the Root CA certificate for the authorising domain and the certificate to authenticate ADFS requests to the server. These should have been supplied by a system administrator from the authenticating domain.  If they have not, see Appendix B on obtaining root certificates from ADCS.
  3. In the Certificates MMC window, expand Certificates (Local Computer) then Trusted Root Certification Authorities and right-click on Certificates and select All Tasks -> Import... (Import Root CA)
  4. Go through the wizard and pick the Root CA certificate file you have been provided with (if you have downloaded the file from the ADCS page then it'll probably be called certnew.cer)
  5. Finish the wizard leaving all other options on the default setting
  6. In the Certificates MMC window, expand Certificates (Local Computer) then Personal and right-click on Certificates and select All Tasks -> Import... 
  7. Go through the wizard and pick the server certificate file you have been provided with (if you have downloaded the file from the ADCS page then it should have a .pfx extension and be password protected)
  8. Finish the wizard leaving all other options on the default setting
Step 5 - Run the Federation Utility Wizard

Start the wizard

The Federation Utility Wizard (fedutil.exe) can be found under: C:\Program Files\Windows Identity Foundation\v3.5\ or C:\Program Files (x86)\Windows Identity Foundation SDK\v3.5\ .

Run the Federation Utility Wizard as an Administrator. This is most important as it allows a scheduled task to keep the federation metadata documents up to date. 


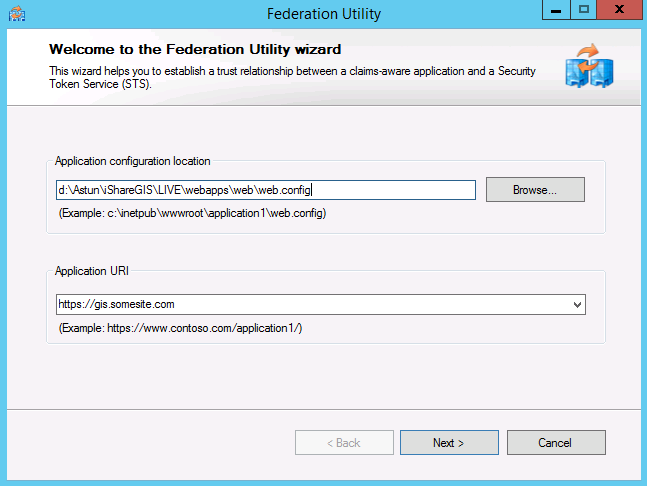
Screen 1 - Welcome

Enter the application configuration location (the web.config) and the Application URI (https://gis.somesite.com)


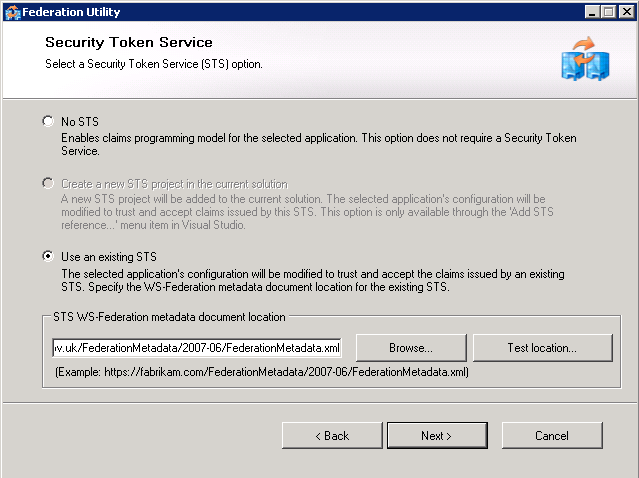
Screen 2 - Security Token Service

From Stage 2, the customer should provide us with the URL of a FederationMetadata.xml file, enter that in STS WS-Federation metadata document location. The URL will follow this structure: https://<FQDN>/federationmetadata/2007-06/federationmetadata.xml.

NOTE: In some circumstances the customer does not make their ADFS proxy available to us, in that situation they must download the file themselves and send it to us, save it to the {{WebApps}} folder for the iShare GIS installation and then enter the document's local path in here instead of a URL.

Always click Test location... this will ensure that the file can be reached. 


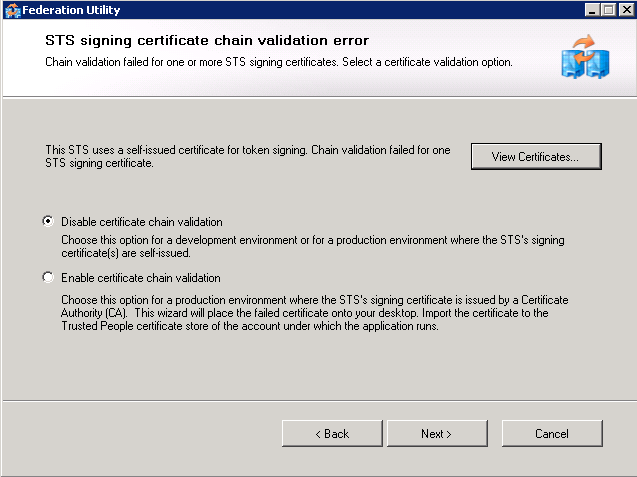
Screen 3 - STS signing certificate chain validation error

Info
titleNote

This screen only appears when the certificate chain validation fails. 

This screen will appear if the certificate chain cannot be validated all the way back to the root Certificate Authority (CA).  This will happen if the certificate was self-issued or if the CA is not one trusted by the server (e.g. an Active Directory CA when the iShare server is not part of the Active Directory).

At this point there are three choices:

  1. Disable certificate chain validation - essentially means there are no checks to trust the certificate.   
  2. Enable certificate chain validation - this will then export a certificate that can be imported into the Trusted People store.  Effectively we are manually confirming that the certificate can be trusted, even thought it does not route all the way back to the root CA.  A certificate will be generated by the Federation Utility on the current user's desktop. This certificate can then be imported into the Trusted People certificate store of the local computer using MMC's Certificates snap-in.  Whilst this will enable chain validation, it is not ideal as once the certifcate expires, the ADFS authentication will no longer work.
  3. Exit the Federation Utility Wizard and install the Certificate Authority such that Screen 3 is skipped next time the wizard is run.


Info
titleAt this point

Check that the customer gave explicit confirmation (in Stage 2, 2.2) that they accept any risk of using self signed certificates without chain validation and select option 1 (Disable).

Or obtain the Root and any Intermediate certificates from the customer (or via instructions in Appendix B) and follow the steps to install the certificate described in Stage 5, step 4.


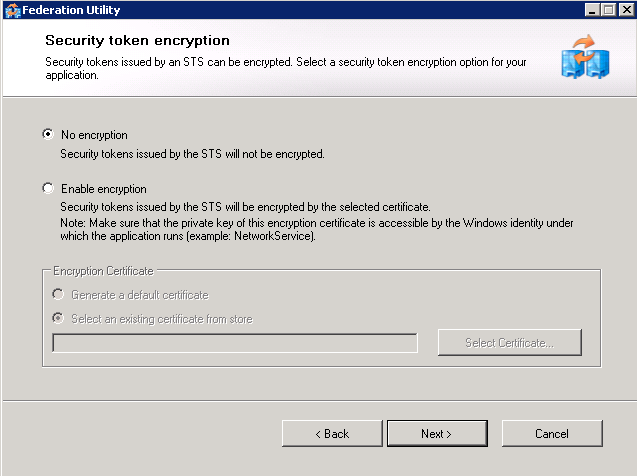
Screen 4

If encryption was chosen in the ADFS Relying Party configuration then enable encryption. If they have provided the private key of the token encryption certificate it should be selected here. After the Federation Utility has been completed allow the iShare GIS web application pool access to the certificate through MMC's Certificates snap-in. 

Image Modified


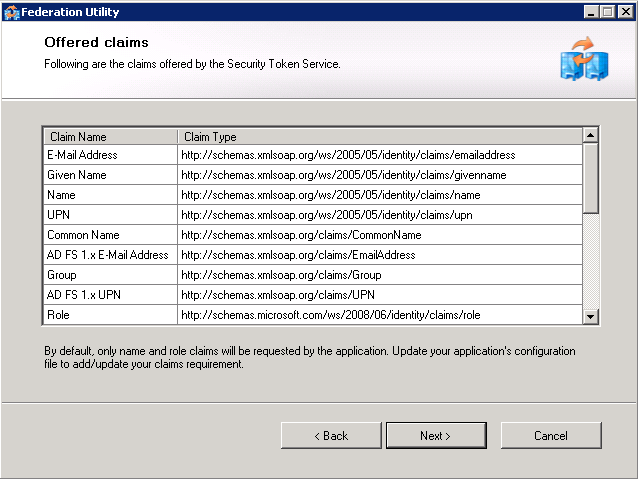
Screen 5 - Offered clains

The utility now presents a series of claims offered by the Security Token Service. All look good? Click next.

Image Modified


Screen 6 - Scheduled task

Select scheduled task. This is only effective if the STS federation metadata document (see Screen 2) has been supplied via URL. This is most important as otherwise the trust will eventually break down when certificates expire.

Copy the configuration summary to the iShare GIS module page in the client notes.


Additional Tasks

Check Windows Task Scheduler for the WIF task. This will be under Task Scheduler Library > Microsoft > Windows > WindowsIdentityFoundation. You may wish to run this to see if it completes correctly.

Did you specify a certificate for security token encryption? If so you will have to allow the iShare GIS web application pool read access to the certificate. Do this by running MMC > Local Computer > Certificates snap-in > Select certificate > Right click Manage Private Keys. Add application pool user account.

If required, add logging to the web.config file for the web application - this can be done by adding the following top-level element to the XML, at the end of the file:

Paste code macro
languagexml
<system.diagnostics>
	<sources>
		<source name="Microsoft.IdentityModel" switchValue="Verbose">
			<listeners>
				<add name="xml" type="System.Diagnostics.XmlWriterTraceListener" initializeData="D:\Astun\iShareGIS\LIVE\WebApps\Web\logs\ADFS_WIF.xml" />
			</listeners>
		</source>
	</sources>
	<trace autoflush="true" />
</system.diagnostics>

The generated log will show details of users and claims.

Note that this log can grow very large, so the code above should be disabled when not needed.

...