How to create your iShare Solo Map - from v5.4.0
5.4.0+
As with iShare Lite, the best way of explaining how to configure iShare Solo for your specific requirements is to follow an example. In this code example we have included all the possible panels that may be included. An example page "atSoloMap.html" is included with iShare in the WebApps\Web\Examples (WebApps\Web for older versions) folder.
When creating your own Solo Map please take a copy of the latest example atSoloMap.html as this page may not contain the latest changes.
In order explain the above example we have once again split it into its component parts:
1. Include the basic JavaScript files
<script type="text/javascript" src="js/lib/prototype-1.6.0.3.js"></script>
<script type="text/javascript" src="FileIncluderJS.aspx"></script>
<script type="text/javascript" src="js/solomap.js"></script>
2. Define your Panels
Now you can configure the panels that you wish to display.
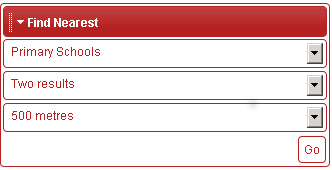
soloMap.addFindNearestPanel();
soloMap.addSearchForPanel();
soloMap.addSearchPanel({ 'title': 'My Search Panel' });
soloMap.addShowmapCategoriesPanel({ collapseInStart: false });
soloMap.addTakeMeToPanel();
If you leave all of the panel types included in the web page they will only be displayed if they have been configured in iShare Studio. In this way you will not have to revisit this code if you later decide to configure ‘Take Me To’ layers or ‘Search for’ layers for instance in iShare Studio.
collapseInStart
You may change whether you wish to panel to be displayed collapsed or not by setting the collapseInStart to ‘true’ for initially collapsed or ‘false’. E.g.
|
|

title
soloMap.addFindNearestPanel({"title": "Locate Nearest Features"});
3. Set Map Options & Additional Features
Now you need to define the map options and any additional features (layers) that you wish to use for your map.
soloMap.createMap('atMap', {
	themeName: 'base',
	mapSource: 'Workshop/AllMaps',
	layers: 'primary_schools,secondary_schools',
    view:{easting:495553, northing:175654, zoom:2000}
});
themeName
This entry allows the map to use a different CSS/image set which are stored in /web/css/jquery/ folder. In this example we have used ‘base’ but it may have one of the following values: 'base', 'astun', 'blitzer', 'blue' & 'ui-lightness'
mapSource
This is the map source that you wish to be displayed in your Solo Map. If you don't specify a mapSource then the Default Map Source will be used.
layers
If you wish to include additional Map Features to be displayed when the map is loaded then you may define a layers parameter with as many layers as you wish by separating each Layer name (not Display Name) with a comma. In the above example we have chosen to display Primary and Secondary Schools. These layers must be defined within iShare Studio.
If you don't specify the layers parameter then the layers configured as Visible on Startup will be displayed.
view
geoRSS
This is another optional parameter that has not been included in the above example. Please see Including a GeoRSS Feed for details.
4. Set the Map Size
<style type="text/css">
	#atMap {
		position: relative;
		height: 500px !important;
		width: 100%;
		padding: 0;
		border: 1px solid #ccc;
	}
</style>
The height parameter is defined as “!important” in order that it is not overridden by any other style sheet. You may adjust these values based on the size of map you wish to display.
The map will always take its size from that of its containing element, so you must always set a size explicitly.
5. Include the basic iShare Style Sheets
You need to include the basic iShare Style Sheets that are used across iShare in order that the map popups etc. are styled in a similar manner across iShare Maps. You will need to change these entries to point to your basic iShare style sheets.
		<link rel="stylesheet" type="text/css" href="custom.example/css/iShareCommon.css"  />
		<link rel="stylesheet" type="text/css" href="custom.example/css/Map.css"  />
		<link rel="stylesheet" type="text/css" href="custom.example/css/atPrint.css" media="print" />
		<link rel="stylesheet" type="text/css" href="css/jQuery/astun/ui.all.css"  />
6. Define the Map and Results areas
Now we need to define the Map and Results areas.
<div id="atMyMaps" style="width: 800px;"> <!-- #atMap --> <div id="atMap" class="atPanelContent"> <div id="atInitialLoader" class="ui-state-default" style="padding: 10px; margin: 125px auto auto; text-align: center; width: 75px; font-family: Helvetica; -moz-border-radius: 5px; -webkit-border-radius: 5px;">Loading...</div> </div> </div> <div style="clear: both"> </div> <div id="atPanelResults" style="display: none; padding: 5px; margin-top: 10px; font-size: 80%" class="ui-state-default ui-corner-all"> <h3 style="margin: 5px">Map Information:</h3> <div id="atResults">Results</div> </div>
atMap
First we need to define the area to be used for the map on the web page together with the border style. In the above example this is “atMap”.
We have also defined an id "atInitialLoader". This is so that you can display a message to the user whilst the panels are loading. In the above example we have used the words “Loading…”. This line is not compulsory but you must not change the id of this <div> as it is used internally within iShare.
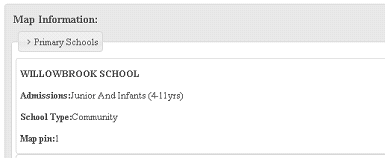
atPanelResults
Lastly we need to define the area for the Results returned from ‘Search For’ and ‘Find Nearest’ queries and this is defined by the "atPanelResults". In the scenario above we have a heading of “Map Information” which may be changed if required. E.g.