...
From the Administrative Tools area, open the Data Sources (ODBC). The Administrative Tools can usually be found in the Control Panel.


- Select the System DSN tab


- Click on the Add… button.


- Choose the Microsoft dBase Driver (*.dbf) driver and press Finish.

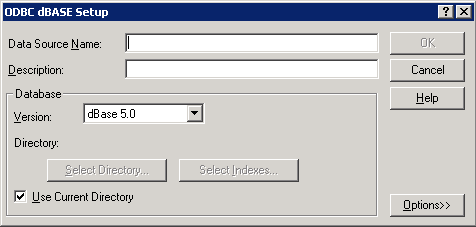
- Complete the ODBC dBase Setup by entering the Data Source Name, use something that will uniquely identify the source data, e.g. DBF Schools.
- Enter a brief Description for the Data Source if you wish.
- Uncheck the Use Current Directory and using the Select Directory… button, choose the directory where the dbf file is stored.
- Now click OK and the new entry should appear in the System DSN list.
...
- In this case we need to create a Standard Data Source.
- On the Provider tab, and choose the Microsoft Jet 4.0OLE DB Provider option from the list.
- On the Connection tab enter the directory where the DBF file is stored. You do not need to fill in any log on information.
- Now select the All tab.
- Select the Extended Properties entry from the list, and click the Edit Value button.


- In the dialog that appears, enter the Property Value dBase 5.0 and press OK.
- To ensure that the connection is setup correctly, you can go back to the Connection tab and click the Test Connection button. Once correctly setup, click OK.
- You are now taken back to the Create New Data Source dialog.
- Click the Construct SQL… button.
- This should bring up a list of the available fields in the DBF file. If there is more than one DBF file in the directory, you may have to use the drop down to select the one you require. Select the fields you wish to import, and click OK.
- Click OK on the Create New Data Source dialog, and you will now have a new entry in Data Share.