This is the Layer Control where you can select which map layers you wish to include in your map and whether or not you wish to display the information for that layer. You can also create your own Annotation layers which you may customise and share with other users if required.
If you cannot see the Map Categories overlay then you will need to click on the button; this may also be used to hide this overlay.
| |
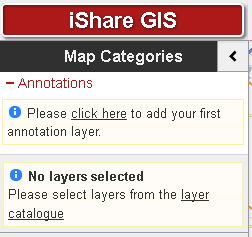
If you have never added any layers / layer groups for the selected Profile then the Map Categories panel will display a message say “No Layers selected - Please select layers from layer catalogue. Clicking this link is the same as clicking the Layers button. If you have not created any Annotation layers then there will also be a message with a link to adding your first layer as shown in the screenshot. Please see the topic on Annotation Layers for more details. | |
Once layers have been added to the map via the Layer Catalogue you will see these available for selection. Clicking on the + or - beside the Layer Group e.g. Education and Learning in the screenshot, will expand or collapse the view of individual layers. Hovering with the mouse over the small arrow displays the Actions available for the Layer / Layer Group: Remove Layer from map or Layer Group from list Check to show results for the layer. You could want to display the layer on the map but not return results when selecting or searching. Find Nearest Information about the layer Edit the Filters for the layer Configuration of the map layer will determine which entries you see for a particular layer. | |
| If you wish to Reset your Map Categories back to the default layers then click the button at the bottom of the Map Categories window. |


