Step 1 - Load data into PostGIS
You may already have a Workflow Task to copy your data to a shape file. These steps will show you how to change this Task to output to PostGIS or to create a new Task if your data is not already being output to a shape file.
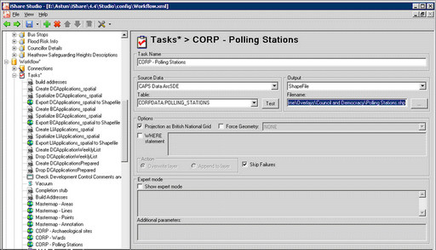
If you already have a Workflow task that outputs data to a shape file then first find this Task under the Workflow > Jobs > Unassigned tasks node or under a specific Job entry and select it. |
|
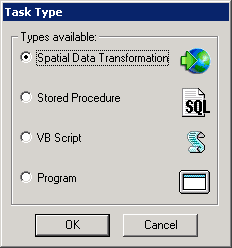
If you want to create a new Workflow Task right click on the Tasks node, select New Task and then pick Spatial Data Transformation as the Task Type and click OK.
|
|
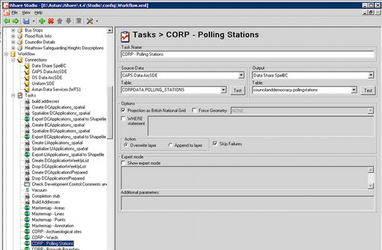
If you are creating a New task then you will need to enter the following: Task Name Enter a unique name for your task. It is advisable to call this something relevant as this name will be used to populate list box selections when creating Jobs. Source Data This list will include all database Connections select the one you want and then you will be able to select the relevant Table entry.
Whether you are creating a New Task or simply changing your existing task you will need to configure the Output. Output Here you will need to select your Datashare [PostGIS] connection from the drop down selection and then in the Table entry type in the name of the table that you are going to create in Data Share. This needs to be in the format of schemaname.layername E.g. councilanddemocracy.pollingstations as in the screenshot. |
|
Click on the Save button to save the Task. Now we need to run the Task to create the table in Datashare. Right click on the Task in the explorer and select "Run Task ......" | The task should run without errors. |
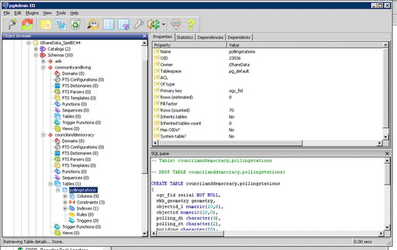
Now you can check in pgAdmin that the table has been created. Open pgAdmin. Expand the node for your Data Share database, expand the Schemas node, expand the node for the schema name you entered above and you should see that the table has been created. |
|