Install Astun Scripts on Data Share database
- Kim Stimpson
AstunPGInstaller is the program which installs all the Astun scripts for the Data Share database. This will have been installed with iShare and may be found in the following folder e.g. D:\Astun\ishare\n.n\AstunPGInstaller.
You will be requested to perform a database backup if one has not already been done on the day you run the installer. This may take a little while depending upon the size of your database.
To backup the iShare database regularly please see Backing up your Database for details. You may also wish to Extract Non-System Functions from the iShare Database before running the installer, especially if you have any bespoke functions.
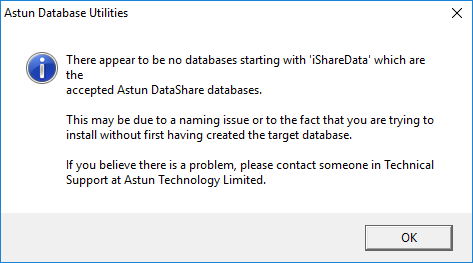
If you see this dialog then this may be password problem so try re-entering your password and click on the Refresh button.
If you are upgrading to a newer version of iShare you will also be given a link to download the latest AstunPGInstaller as this can also be used to upgrade your iShare database with the latest functions. When your run the AstunPGInstaller.exe and click Start you will be asked if you want to backup your database before updating with the latest scripts. Then you will see the Update Options.
- Run AstunPGInstaller.exe
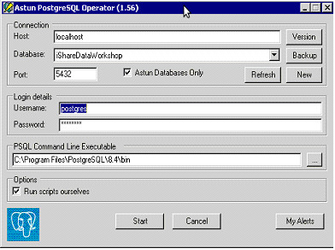
- Enter the following details:
Connection
Host
Select the Host Name where your Astun database resides.
Database
Make sure you select the database you created in the previous step.
Port
If you wish to use a different port then enter it here.
Astun Databases only
Make sure you leave this box checked so that the list of databases will be limited to databases beginning with ‘iShareData…’.
Login details
By default the Login details used are the standard ‘postgres’ Username and Password. Change these to those needed to access the selected database. If the details are incorrect, the software will not be able to access the database or cluster.
PSQL Command Line Executable
This should be the correct command line location of the psql.exe application. This is picked up from the installation information for PostgreSQL. You should change this only if you are sure that it is incorrect.
Options
Run scripts ourselves
This indicates that the Installer application will communicate directly with PostgreSQL using the Npgsql module. If this is unselected the Installer will attempt to communicate with PostgreSQL via PGWorker.exe, the Python module. Communication via Npgsql is deemed more stable.
Buttons
Version
The ‘Version’ button will allow you to see the version information. This information includes the version of the AstunPGInstaller itself as well as the versions of the current installed modules in the selected database.
Backup
The Backup button allows you to make a full backup of the selected database. The Backups are stored in a subdirectory “Database Backups” and are marked with the date. You will only get prompted to do a backup if a backup for today has not already been performed.
Refresh
Clicking this button refreshes the list of databases.
New
This button allows you to create a new database if the desired one has not already been created. For more information see section Create the Data Share database.
MyAlerts
This button will install or update the MyAlerts database. Please see My Alerts Database topic for details.
Start
This button start the installation process.
- Click the Start button and, if you have not made a backup today for this database, you will be prompted to perform one at this point e.g.
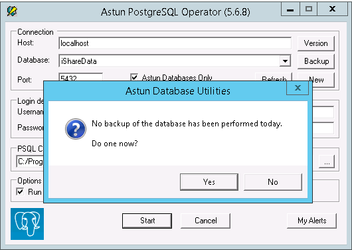
- Click Yes to perform a backup or No to continue running the installer. Backups will be written to the Database Backups folder under the AstunPGInstaller folder.
- If you are running the Astun PGInstaller on a new database then none of the functions will have been installed and you will see red crosses for each entry e.g.
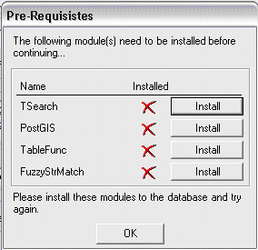
- Click on the Install button for the first module and when the installation has finished you should see a green tick e.g.
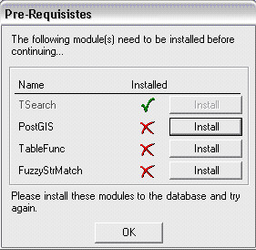
- Repeat the process for any modules that display a red cross as this means that some of the standard modules that iShare require are not installed in this database.
Install Options
The Install Options screen indicates that no Astun Modules have been installed in the chosen database and allows you to pick the modules you wish to install.
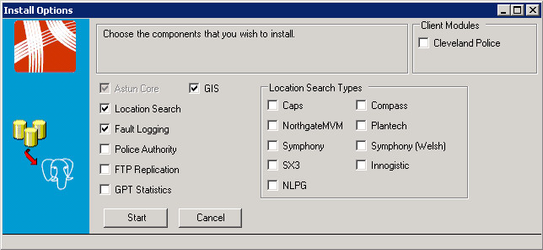
By default, the Astun Core is always installed. Also by default, Fault Logging and Location Search are chosen. You should choose which of the types of Location Search you are going to use. Choosing more than one Location Search type will result in a warning message only. It is perfectly acceptable to have more than one type, e.g. Symphony and Symphony Welsh.
- Press the Start button to begin the installation.
Update Options
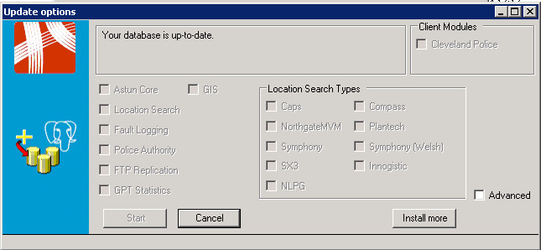
The Update Options screen will indicate any modules for which there are updates available, these modules will appear enabled and can choose to ignore certain modules if you wish. The only update that you cannot ignore is the Astun Core. If there are updates to the core, they will automatically be applied.
- Press the Start button to start the update process.
Install More
Clicking the Install more button will display the following screen allowing you to add additional modules that you did not choose in the original installation.

Advanced
By enabling the Advanced option, a Delete button will be made available. Click the Delete button this allows you to move to a Removal options screen.
This screen allows you to remove modules that you no longer want. Remember that in doing so, the module and all associated data will be removed and cannot be retrieved, so doing this is not reversible.
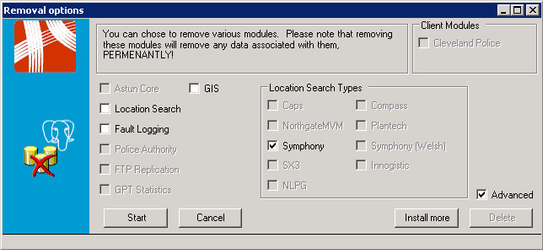
For client databases that were installed and updated using the older scripts, this screen will also prompt you to remove modules that are perceived as not being used (in the older version all modules were installed whether they were to be used or not). A message indicating that certain modules were so chosen is displayed.