Connect MapInfo to iShare SDW
- Mike Saunt
- Kim Stimpson
- Jo Cook (Deactivated)
- Andrew Bailey
| System Category | GIS |
|---|---|
| Source | Astun Spatial Data Warehouse |
| Available since | 2015 |
| Organisation |
A brief guide to the iShare Spatial Data Warehouse
The iShare Spatial Data Warehouse (SDW) is a database provided by PostgreSQL/PostGIS. Within a SDW there will be various schemas that relate to business functions within an organisation such as 'environmental health' or 'planning'. Within each schema spatial data is held, access to which is controlled by the GIS Administration team of the organisation. They will create user accounts for each user and assign them permissions to read and write to the schemas as appropriate. All tables in each schema have the same security controls.
An end user will be provided with the connection details that are required to connect to the SDW. They will also notify each end user of the schemas that they have read and write access to.
All users have the right to create new tables in the staging schema. By default any tables that a user creates in the staging schema will not be accessible to other users unless the GIS Administration team have set it to be so. Consider the staging schema a private area where data can be created before it is considered ready for corporate consumption. Once ready the GIS Administration team will move the table to a business schema and it will adopt the permissions of the schema that it resides within.
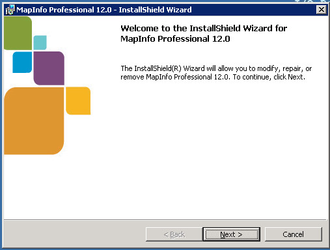
Install MapInfo Professional
Install MapInfo Professional on the local machine. This can either be the MapInfo Professional 64-bit version or the 32-bit version (as shown below).
Download and Install PostgreSQL ODBC driver
Download the Windows PostgreSQL ODBC drivers from www.postgresql.org or click the Download link below that applies to your version of MapInfo.

Download links:
64-bit download psqlodbc_09_06_0400-x64.zip
32-bit download psqlodbc_09_00_0310.zip.
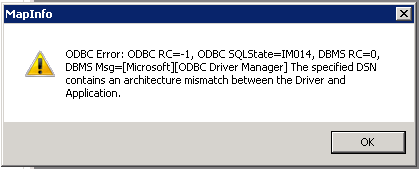
My Windows version is 64-Bit
MapInfo Professional v12.0 is a 32-Bit application and as such cannot access 64-bit ODBC drivers. If you try this you will get an 'architecture mismatch' error message in MapInfo Professional similar to the following
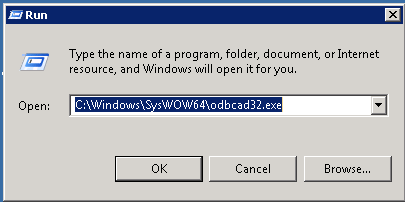
Create an ODBC connection
| MapInfo 64-bit | MapInfo 32-bit |
|---|---|
| Use the application Search to look for ODBC Data Sources and select the 64-bit result. | From the windows desktop go to Start -> Run (or Win+R to open the Run dialog) Enter the following command to open the 32-bit ODBC Administrator C:\Windows\SysWOW64\odbcad32.exe
|
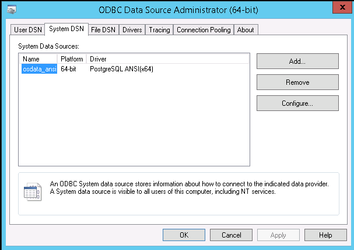
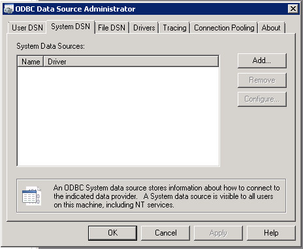
Select the System DSN tab and click Add... |
Select the System DSN tab and click Add... |
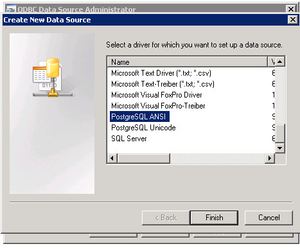
Select the PostgreSQL ANSI driver and click Finish. |
Select the PostgreSQL ANSI driver and click Finish. |
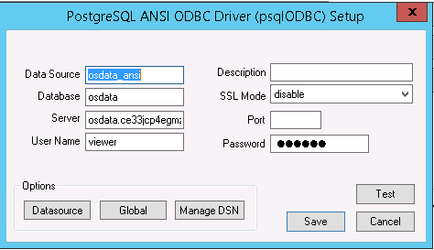
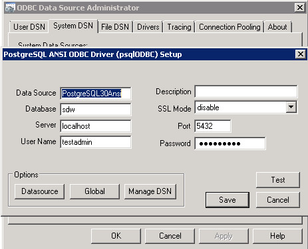
Enter the details of the PostgreSQL database you wish to connect to and click Test. |
Enter the details of the PostgreSQL database you wish to connect to and click Test. |
MapInfo Professional documentation recommends setting the Datasource option "Use Declare/Fetch" for each connection to improve performance. Click on the Datasource button to display the Advanced Options dialog, check "Declare/Fetch" and click OK. | |
| Click Save. | Click Save. |

Example of opening an PostGIS layer in MapInfo
The user has experience with MapInfo Professional, PostGIS, ODBC configuration and relevant Administrator rights on the client PC
| MapInfo 64-bit | MapInfo 32-bit |
|---|---|
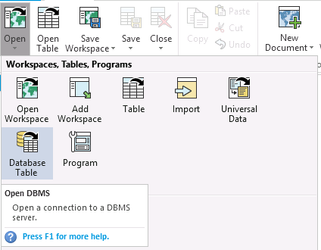
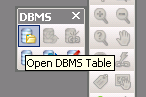
From the Open menu select Database Table.
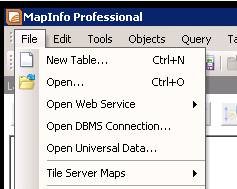
| From the MapInfo menu go to File -> Open DBMS Connection
|
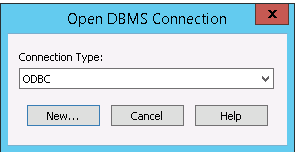
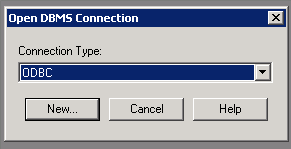
Select ODBC and click New... |
Select ODBC and click New... |
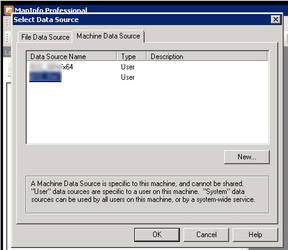
Click on the Machine Data Source tab and select the correct connection for your database and click OK. |
Click on the Machine Data Source tab and select the correct connection for your database and click OK. |
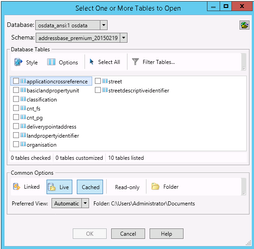
Now you have a connection to the database you can Open various tables that have been loaded.
| Now you have a connection to the database you can Open various tables that have been loaded.
|


Example of creating a PostGIS layer in MapInfo
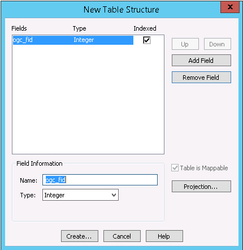
In the Field Information at the bottom of the dialog add ogc_fid as the Name and select the Type of Integer and click the Add Field button. Now check the Indexed box to add this as an index field. Add any other attribute fields that are necessary.Click the Projection... button.
| MapInfo 64-bit | MapInfo 32-bit |
|---|---|
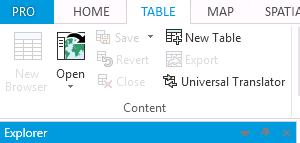
Select New Table from the TABLE ribbon.
| Select New Table from the File menu. |
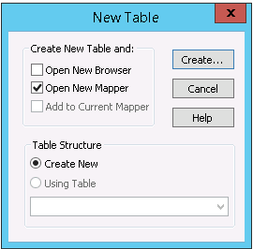
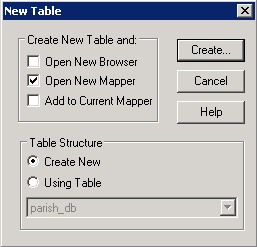
Check the Open New Mapper box and select the Create New radio button to create a new table structure. Click Create... |
Check the Open New Mapper box and select the Create New radio button to create a new table structure. Click Create... |
In the Field Information at the bottom of the dialog add ogc_fid as the Name and select the Type of Integer and click the Add Field button. Now check the Indexed box to add this as an index field. Add any other attribute fields that are necessary. Click the Projection... button. |
In the Field Information at the bottom of the dialog add ogc_fid as the Name and select the Type of Integer and click the Add Field button. Now check the Indexed box to add this as an index field. Add any other attribute fields that are necessary. Click the Projection... button. |
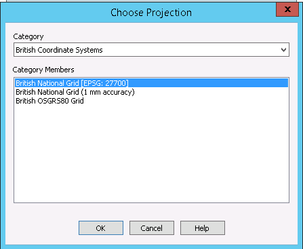
Select the Category British Coordinate Systems and then click the British National Grid [EPSG: 2700] Category Member and click OK. | Select the Category British Coordinate Systems and then click the British National Grid [EPSG: 2700] Category Member and click OK. |
| Click Create. | Click Create. |
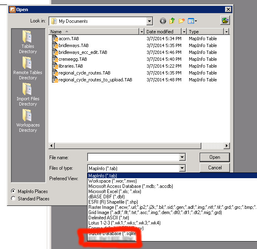
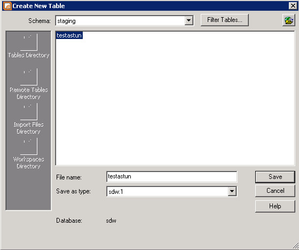
In the Create New Table dialog select Save As Type and choose the ODBC connection to the Spatial Data Warehouse, select the staging schema and provide a suitable name for the table. |
In the Create New Table dialog select Save As Type and choose the ODBC connection to the Spatial Data Warehouse, select the staging schema and provide a suitable name for the table. |
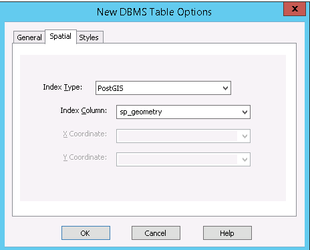
n the New DBMS Table Options dialog under the General tab select ogc_fid as the Primary Key column. Click on the Spatial tab.
Select PostGIS as the Index Type and sp_geometry as the Index Column. Click OK and the new table will be created. MapInfo will notify you that the table has already been added to the Map Catalog. You can ignore this message. | n the New DBMS Table Options dialog under the General tab select ogc_fid as the Primary Key column. Click on the Spatial tab.
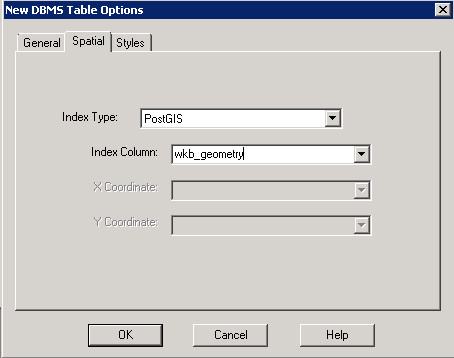
Select PostGIS as the Index Type and wkb_geometry as the Index Column. Click OK and the new table will be created. MapInfo will notify you that the table has already been added to the Map Catalog. You can ignore this message. |

Modifying MapInfo Workspaces to point to PostGIS layers
Users that are transitioning to iShare SDW will naturally have tab files either holding local data or referencing data held in other DBMSs. One can either edit the workspace .wor file in a text editor to point to a new PostGIS tab file or overwrite the existing tab file with a PostGIS tab file.
- Overwriting an existing tab file.
Check the location of the file you wish to overwrite by opening the workspace .wor file in a text file. The tables are listed towards the top such as;
Open Table "\\path\to\the\tab\file" As <an_alias> Interactive
- Make sure that the tab file you want to overwrite is not currently open by MapInfo. Use File > Close table to check.
- Use File > Open Table to select a table from the SDW.
- Save As the existing tab file.
- Edit the workspace .wor file to use a new tab file.
- Open the workspace .wor file in notepad.
- In MapInfo use File > Open Table to select a table from the SDW
- Save the table as a new .tab file.
- Edit the workspace .wor file to use the new location.
- The alias can remain the same
- If the table definition is different from the original .tab table definition then you will need to check usage of the table within the workspace such as Map definitions where a field name is used for labelling.
- Save the workspace .wor file.
- Load the workspace into MapInfo to check. MapInfo will report any errors or warnings that can be corrected.
Data considerations
The following considerations apply when editing data stored in PostgreSQL within MapInfo Professional.
- Tables without a geometry type constraint will allow users to insert any geometry type into the table which may not be desirable. Clients such as QGIS and iShare GIS enforce a single geometry type per layer while MapInfo does not. To avoid this a geometry type constraint can be added to the table.
Default geometry type constraints such as those added by ogr2ogr when data is loaded via a Spatial Data Transformation Workflow Task may be too restrictive for MapInfo. If a table is loaded as MULTIPOLYGON but contains a mix of POLYGON and MULTIPOLYGON features (as is quite common) saving an edit to a polygon in MapInfo will fail as the update statement issued by MapInfo Professional will attempt to insert a POLYGON which will fail the constraints check. This can be overcome by dropping the MULTIPOLYGON constraint and replacing it with a check for MULTIPOLYGON or POLYGON
Drop existing constraint and add new inclusive geometry type checkALTER TABLE countryside.tpo DROP CONSTRAINT enforce_geotype_wkb_geometry; ALTER TABLE countryside.tpo ADD CONSTRAINT enforce_geotype_wkb_geometry CHECK (geometrytype(wkb_geometry) = 'POLYGON'::text OR geometrytype(wkb_geometry) = 'MULTIPOLYGON'::text OR wkb_geometry IS NULL);
MapInfo Professional has a hard limit to the total number of characters defined across all character fields in a table. If the value of adding the size of all character fields combined is greater than 4049 (discussion on MapInfo mailing list)
As the Postgres SDW database is commonly Unicode which is not fully supported by MapInfo Professional, character fields over 127 characters long (half of 254) are not currently editable.