Editing an existing Annotation Feature
- Kim Stimpson
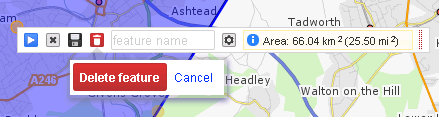
When you create a new feature or select an existing feature with the select tool you will see a popup similar to the following:
 - V5.6.0
 - Pre V5.6.0
Button v5.6.0 | Button Pre V5.6.0 | Description |
|---|---|---|
|  | Show Features - clicking this will display a list of all the features in the Information Browser |
|  | Remove - clicking this reverses changes since the last save of a feature. A little like undo. |
|  | Save / Update any changes to your feature |
|  | Delete Feature [only shown after first Save]. When you select to Delete a feature you will see a confirmation dialog e.g.
|
 | This is where you may enter a name for your feature | |
|  | Properties - clicking this button will allow you to define the Styling for your feature. |
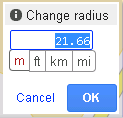
 | This is just displayed information about your feature but for a circle feature clicking the link will allow you to change the radius of the feature e.g.
|


Reshape
You can reshape your feature by hovering over a node until you see a hand and then dragging the node to a new location. If you wish to move the entire feature hover over the centre node to move it. With a Line or Polygon feature you may need to have a little look to find this.
Properties
Clicking the Properties button will allow you to change the specific properties for the selected feature only. See Styling your Annotation Layer for details.
When you are happy with your feature click Save.
If you decide you want to make changes after your have clicked Save then pick the Select tool and click on your feature. This will enable editing.