Add a Data Share Connection
Add an XML Data Source
The first task is to configure the databases that you wish to synchronise. With the Data Share Connections selected right click and select Add DataSource from the context menu. You will see the following dialog:
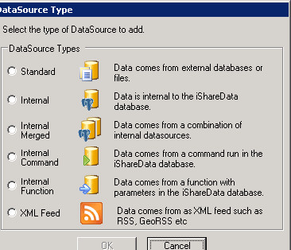
Select the XML Feed type and click OK.
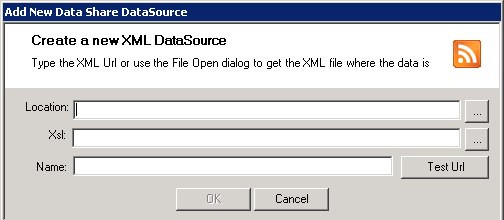
Location
Here you need to enter the URL to the Elgin Roadworks XML data on the iShare Server. This is the file path that is generated by the python script to download the Elgin data and will be the path that you entered as the XMLPath when you customised the download script followed by ElginRoadworks.xml e.g.
D:\Astun\Data\Elgin\ElginRoadworks.xml
Xsl
Browse to the xsl transformation that you wish to use to transform the XML feed. For Elgin you should pick the feedxml-elgin-transform.xsl which can be found in the Studio\config folder.
Name
Enter a name for your XML Feed Data Share connection e.g. Elgin Roadworks.
Click OK
If you have not yet downloaded the Elgin XML (for the first time) then an error will be received on clicking OK - 'Problem encountered while loading the RSS feed'. This can be ignored.
Synchronise the Data Share Connection
In order to populate the Data Share database with the Elgin XML data you will need to Synchronise the Data Share Connection you have just created.
Right click on the Elgin Roadworks Data Share Connection (or whatever you called it) and select Synchronise.
Select Elgin fields to be displayed
Once you have downloaded the Elgin data and synchronised the Data Share Connection, you can then configure the fields that you wish to be displayed as you may not wish to display all of the fields supplied by Elgin.
Click on the Fields entry under the Data Share connection you have just created.
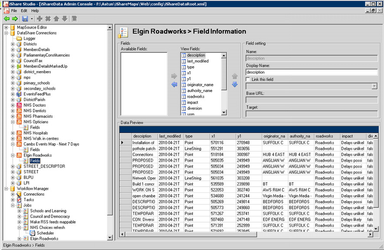
Select the fields whose information you wish to display to the user. As you select a field the data, for the first 30 records in the table, will be displayed in the Data Preview.
Click on each field in turn in the View Fields are and you will be able to configure the Field setting.
Display Name
This entry allows you to enter a different description for the field-name to be displayed to the user.
Once you are happy that you have correctly selected the information that you wish to be displayed click Save.