Create a Dynamic Tilecache
Overview
With this in mind we recommend that our iShare in the Cloud customers create a Dynamic Tilecache for their Base Mapping, but please discuss this with one of the Astun Team via the Support Portal prior to setting this up.
Non iShare in the Cloud customers can use the Dynamic Tilecache too (e.g. to avoid other CPU heavy tasks, such as Workflow, or to avoid server back up times during over night runs). Again please contact the Astun team via the Support Portal for further information.
Source taken from ESDM.
Step-by-step guide
Step 1 - Download & Extract Tilecache
- Download the tilecache.zip from http://download.astuntechnology.com/public/tilecache.zip.
- Overwrite existing tilecache folder (D:\Astun\Tools\TileCache) with the tilecache folder in the zip file excluding the tilecache.cfg file.
- Ensure that your python environment has the pillow library installed
Step 2 - Install the IIS6 Scripting Tools
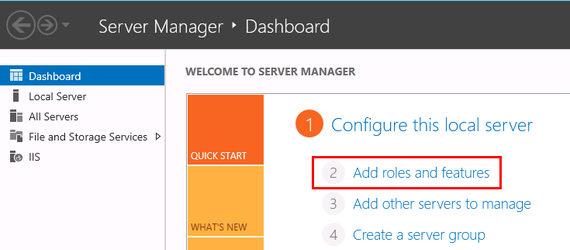
- Now you need to make sure that the IIS 6 Scripting Tools feature is installed. Open Server Manager and select Add roles and features e.g.
- Select the Role-based or feature-based installation radio button and click Next.
- Select the Select a server from the server pool radio button and click Next.
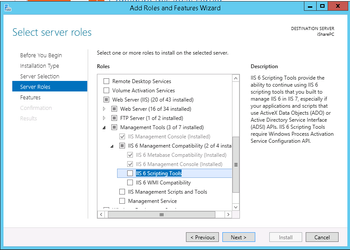
- Expand the Web Server (IIS) > Management Tools > IIS6 Management Compatibility and tick the IIS 6 Scripting Tools entry e.g.
- When you tick the box the following dialog will be displayed.
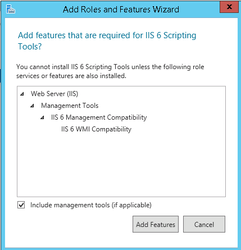
- Click Add Features and keep clicking Next until you get to the Confirm installation selections dialog where you click Install.
Step 3 - Create the Tilecache Web Application
- Now we will create the Tilecache Web Application.
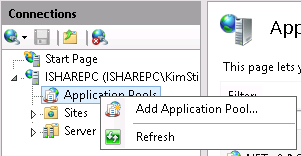
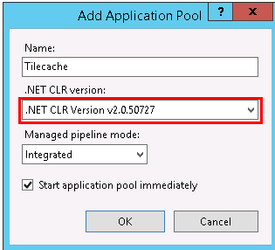
- Open IIS and create an Application Pool called Tilecache e.g.
- Select .NET Version 2.0 and click OK e.g.
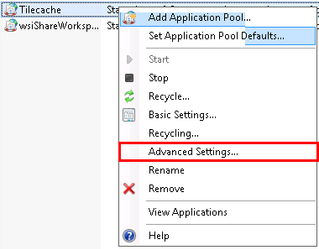
- Right click on the Tilecache Application Pool you have just created and select Advanced Settings... e.g.
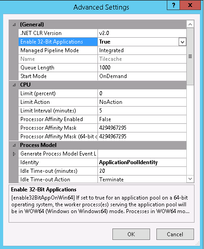
- Make sure that Enable 32-bit Applications is set to True e.g.
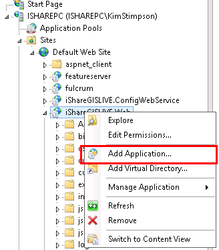
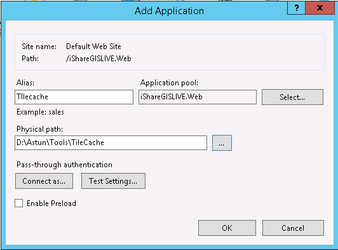
- Now you need to create the Tilecache Web Application under the iShare GIS application. Right Click on iShareGISLIVE.Web (or whatever your IShareGIS application is called) and select Add Application... e.g.
- Enter the Alias as Tilecache and select the Physical path to the tilecache e.g.
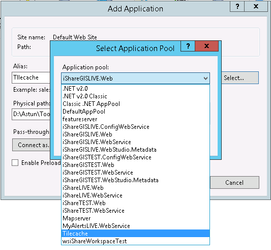
- Now click the Select... button to select the Tilecache Application pool e.g.
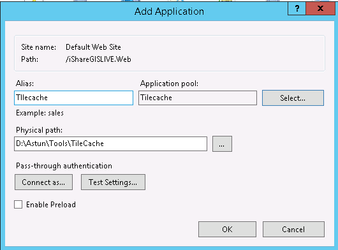
- You should end up with a dialog similar to the following:
Step 4 - Configure Tilecache Web Application
- Next we need to configure Anonymous access to the Tilecache application. Select Authentic.. button
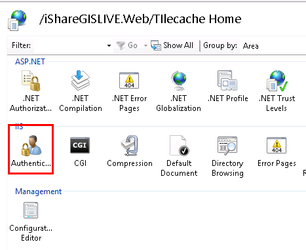
- Make sure that Anonymous Authentication is Enabled and Windows Authentication is Disabled. Right-click on Anonymous Authentication and select Application pool identity as the Anonymous user identity.

- Grant the IIS APPPOOL\TileCache user full control over the TileCache folder in Windows Explorer.
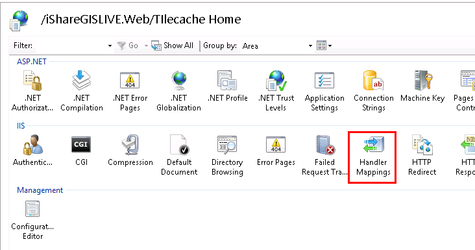
- Next you need to configure IIS to allow the application to run Python scripts so click on Handler Mappings.
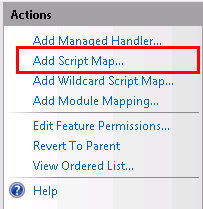
- Select Add Script Map... from the Actions e.g.
- Enter the following:
Request path = *.py
Executable = "C:\Python27\python.exe" %s %s
Name = Python27 (or whatever else you like)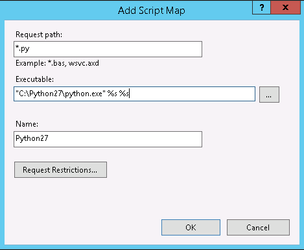
- Click Yes on the message "Do you want to allow this ISAPI extension?".
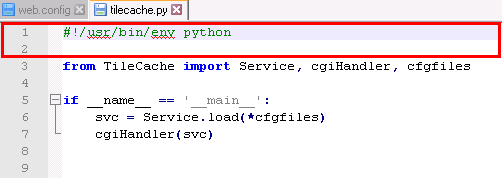
Next you need to edit the D:\Astun\tools\tilecache\web.config file, in a Text Editor such as Notepad++, for the Python27 Handler. If you don't find a web.config then just create a file with that name and make sure it contains the following:
web.config<?xml version="1.0" encoding="UTF-8"?> <configuration> <system.webServer> <handlers> <add name="Python27" path="*.py" verb="*" modules="CgiModule" scriptProcessor=""C:\python27\python.exe" %s %s" resourceType="Unspecified" requireAccess="Execute" allowPathInfo="true" /> </handlers> </system.webServer> </configuration>- In your D:\Astun\tools\tilecache folder delete the existing tilecache.py and then copy the tilecache.cgi as tilecache.py. Now you need to edit the tilecache.py in a Text Editor such as Notepad++. Delete the first two lines (see those outlined in red below)
Now change the svc entry to read -
svc = Service.load(["D:\\Astun\\Tools\\TileCache\\tilecache.cfg"])
e.g.

Step 5 - Create a WMS Base Map
- In iShare Studio you need to create a WMS Base Map that points to the tilecache.py where:
Name = Layer Name from the tilecache.cfg
URI = http://<server>/tilecache/tilecache.py?map=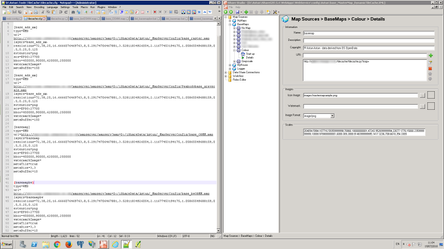
- Ensure the bbox in the tilecache config matches the boundary setting in the 'Start Up' panel of the basemap in Studio
- Calculate the resolutions from the scales in the basemap and update the tilecache.cfg accordingly see BaseMaps Details#Scale%2FResolutionRelationship
Step 6 - Configure Tilecache to avoid any proxy
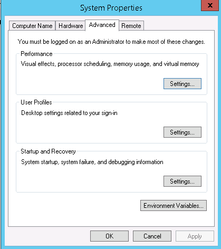
- You will need to add a new Environment Variable. From System Properties, select the Advanced tab and click on the Environment Variables... button e.g.
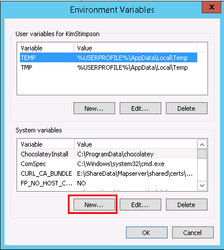
- Click the New... button under System Variables e.g.
- Enter the Variable Name as no_proxy and in the Variable value add localhost and any other domain which is used in the WMS URL in the tilecache.cfg e.g.
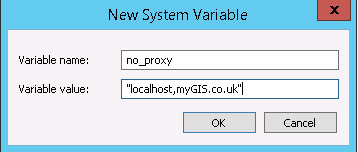
The above screenshot is for a tilecache.cfg WMS URL of "myGIS.co.uk/mapserver/mapserv?map=D:/iShareData/Live/MasterMap.map"
Step 7 - Adding watermark to the tiles (optional)
If a watermark is required, add the following entries to the tilecache.cfg
watermarkImage=<path to watermark file>
watermarkOpacity=0.2 #Adjust this to suit
Step 8 - Multiple DNS entries
To increase the number of simultaneous requests the client can make to the tilecache create DNS entries for the IP that the tilecache can be found on. For instance;
- tilecache0.mycouncil.gov.uk 20.20.20.20
- tilecache1.mycouncil.gov.uk 20.20.20.20
- tilecache2.mycouncil.gov.uk 20.20.20.20
- tilecache3.mycouncil.gov.uk 20.20.20.20
These four domains can be used in the Base Map configuration so that the URL for the Tilecache.py is listed four times as the base map's URI list:
- http://tilecache0.mycouncil.gov.uk/tilecache/tilecache.py?map=
- http://tilecache1.mycouncil.gov.uk/tilecache/tilecache.py?map=
- http://tilecache2.mycouncil.gov.uk/tilecache/tilecache.py?map=
- http://tilecache3.mycouncil.gov.uk/tilecache/tilecache.py?map=
For https access you will need certificates for each tilecache sub-domain. It is easiest to have a wildcard certificate installed on the server that will work for all of them.
- Ensure URL Rewrite 2.0 and Application Request Routing 3.0 are installed. If you have just installed them reboot the server before continuing.
- Create four tilecache web sites in IIS e.g. tilecache0, c:\inetpub\tilecache0 using the TileCache application pool. To stop IIS complaining assign them unused ports such as 83..86.
- In cmd.exe as Administrator:
- cd c:\windows\system32\inetsrv
- appcmd set site /site.name:"tilecache0" /+bindings.[protocol='https',bindingInformation='*:443:tilecache0.mycouncil.gov.uk']
- and repeat for each site
- In IIS URL Rewrite create an inbound rule with the pattern (.*) that rewrites to http://127.0.0.1/{R:1} presuming there is an existing tilecache application on the default web site. If you don't have URL Rewrite in IIS you can download it from https://iis.net/downloads/microsoft/url-rewrite.